Hardwood Floor Repair: Tools and Tips You Actually Need
Learn the Best Ways to Repair Hardwood Like a Pro
As a homeowner, seeing that first deep scratch or hearing a new squeak in your hardwood can be stressful. The good news? You don’t always need to hire a professional or sand your entire home to get a “like-new” finish. Most repairs are manageable with a few specific tools and a bit of patience.
Here is the essential guide to the tools you actually need and the tips that will save you time and money.

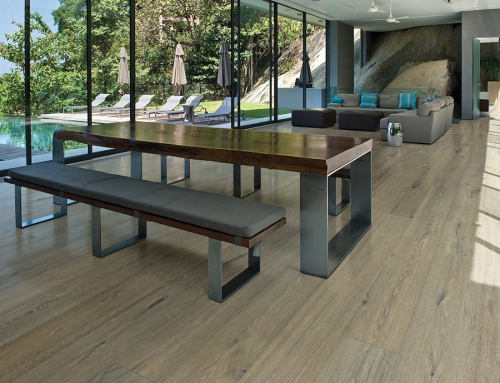
THE ESSENTIAL REPAIR TOOLKIT
Hardwood Floor Repair
Before you start, skip the “as seen on TV” kits. These are the field-tested tools that actually deliver professional results:
-
Wood Stain Touch-Up Markers: For surface-level scratches that have removed the color but haven’t gouged the wood.
-
Hard Wax or Shellac Sticks: Far superior to soft putty for filling deep gouges because they harden and won’t shrink over time.
-
Plastic Putty Knife: Metal knives can accidentally create new scratches while you’re trying to fix old ones.
-
Painter’s Tape: Essential for “fencing off” your hardwood floor repair area so you don’t accidentally get finish or filler on the healthy boards.
-
Assorted Sandpaper (120, 150, and 220 grit): For “feathering” repairs so they blend seamlessly with the rest of the floor.
-
A Fine-Tip Artist Brush: For precision application of polyurethane or oil finish on small spots.
STEAM CLEANER DAMAGE4

STEAM CLEANER DAMAGE44

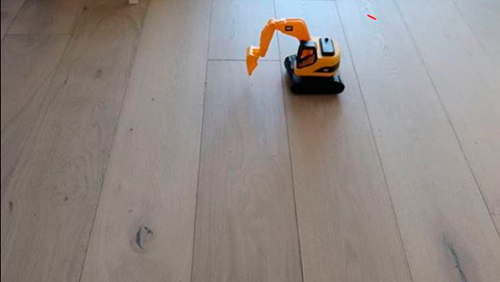
Tip 1: The “Iron and Steam” Trick for Dents
If a heavy object was dropped and “compressed” the wood fibers without breaking the finish, you might not need filler at all.
-
The Method: Place a damp (not soaking) cotton cloth over the dent. Set a clothes iron to “high” and press it onto the cloth for 10–20 seconds.
-
The Why: The steam causes the wood fibers to swell back to their original shape. Once dry, a light hand-sand and a drop of finish make the dent disappear.
STEAM CLEANER DAMAGE3

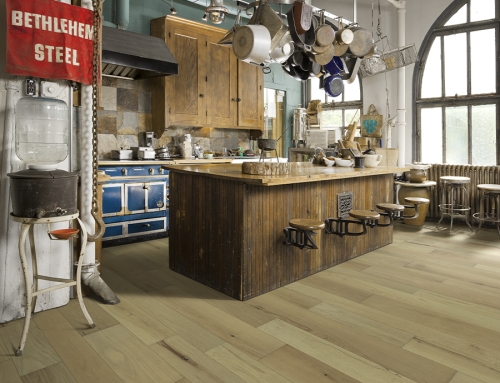
WOOD FLOORING REPLACE/REPAIR/INSTALL

Tip 2: Fix the Squeak, Not Just the Noise
Squeaks usually happen when a floorboard rubs against a subfloor or a nail.
-
The Tip: If you have access to a crawlspace or basement, have someone walk above you while you apply a wood shim and construction adhesive to the gap between the joist and the subfloor.
-
The Surface Fix: If you can’t get underneath, use a breakaway screw kit (like “Squeeeeek No More”). These screws drive through the carpet or wood and snap off below the surface, leaving a tiny hole that is easily filled with a touch-up pen.


Tip 3: Respect the “Season” of the Gap
In humid climates, wood expands. In dry winters, it shrinks.
-
The Tip: Never fill gaps between boards in the winter. If you fill those gaps with hard putty while the wood is shrunk, the floor will have no room to expand come summer. This leads to buckling or “tenting,” which is a much more expensive repair. Only fill gaps that persist year-round.


Tip 4: Match the Sheen, Not Just the Color
The biggest mistake homeowners make is matching the color of the wood perfectly but using a “Gloss” finish on a “Matte” floor.
-
The Tip: Before applying a topcoat to a patch, look at your floor from a low angle against the light. If it’s shiny, go with Semi-Gloss or Gloss. If it’s dull, use Satin or Matte. When in doubt, Satin is the standard for most modern engineered and solid floors.

WHEN TO STOP AND CONSULT A PRO
-
Graying or Black Spots: This usually indicates water has reached the raw wood fibers. This often requires professional sanding or board replacement.
-
Widespread “Cupping”: If the edges of your boards are higher than the centers across a large area, you likely have a moisture issue in your subfloor that a DIY kit can’t fix.
Final Pro-Tip: Always test your stain or filler in a hidden corner or inside a closet first. Wood species like Oak and Hickory take stain very differently, and you want to ensure the color match is perfect before hitting the center of your living room.
Repairing hardwood floors ranges from simple DIY fixes to complex restoration that requires professional machinery. When the damage goes beyond surface-level scratches, hiring a professional ensures the structural integrity and aesthetic of the wood are preserved.

✓ Professional Hardwood Floor Repair Services
-
Sand and Refinish: For floors with widespread dullness, deep scratches, or graying (oxidized) patches. Professionals use industrial belt sanders to remove the old finish and a thin layer of wood, then apply fresh stain and sealant.
-
Board Replacement: If a section is severely rotted, burned, or cracked, professionals can “surgical strike” the area. They cut out individual planks and weave in new boards that match the original species and grade.
-
Screen and Coat: Also known as a “buff and coat.” This is for floors that are structurally sound but have lost their luster. It involves lightly scuffing the top layer and applying a fresh wear layer.
-
Gap Filling: For floors that have developed seasonal gaps or shrinkage, pros use color-matched wood fillers or resin-based epoxy before refinishing.


✓ HIRE A PRO VS. DOING IT YOURSELF
| Situation | Action | Why? | |||
|---|---|---|---|---|---|
| Surface Scratches | DIY | Can usually be fixed with a touch-up pen or floor restorer. | |||
| Deep Gouges | Professional | Requires precision filling and localized sanding to blend with the surrounding grain. | |||
| Water Damage | Professional | Must check for subfloor mold and “cupping” (warping) that requires heavy-duty flattening. | |||
| Engineered Wood |
|
|
✓ TECHNICAL CONSIDERATIONS FOR HOMEOWNERS
If you are consulting with a contractor, keep these industry standards in mind:
-
Wear Layer Thickness: For engineered floors, a professional must measure the remaining veneer. If the wear layer is less than 2mm, it generally cannot be fully sanded and refinished.
-
Moisture Testing: Before any repair, a pro should use a moisture meter. Ideally, hardwood should be between 6% and 9% moisture content to ensure the repair doesn’t buckle later.
-
Finish Matching: Matching a factory-applied finish (like UV-cured aluminum oxide) with an on-site finish is notoriously difficult. Ask your pro about sheen levels (Matte, Satin, or Semi-Gloss) to ensure the repair isn’t visible from across the room.
✓ Quick Tips for High-Traffic Areas
If you have a busy household with frequent foot traffic or pets, consider requesting a High-Traffic Water-Based Polyurethane (like Bona Traffic HD). It cures faster and offers significantly better scratch resistance than standard oil-based finishes, though it often comes at a premium price.
Suggested Watch
![Hardwood Floor Cost Installed: Turnkey Estimates [per sq.ft.]](https://hallmarkfloors.com/wp-content/uploads/2026/05/Hallmark-Floors-Novella-Melville-Hickoryhome-install-by-Carpet-Depot-500x383.jpg)