Engineered Hardwood Installation: What to Expect
Guidelines Ensuring a Flawless Finish
The installation of engineered hardwood begins long before the first plank is laid, starting with a crucial period of acclimation. For several days, your home becomes a temporary warehouse as the wood is delivered and left in its original packaging to adjust to the unique temperature and humidity of your living space. This patience ensures the wood won’t warp or buckle once it’s secured. While the wood settles, your rooms are cleared of furniture and the old flooring is removed, exposing the subfloor. This foundation is then meticulously inspected; installers will grind down high spots, fill in low dips with leveling compound, and verify that the surface is bone-dry and structurally sound to prevent future squeaks.
Preparation / Logistics / Materials


Once the preparation is complete, the actual installation feels like a high-stakes puzzle coming together. Installers snap chalk lines to ensure the first row is perfectly straight, which is vital since any minor tilt at the start will magnify as they work across the room. Whether they are using the “floating” method—where planks click together over a cushioned underlayment—or the “glue-down” method for a more permanent feel, you will notice them staggering the joints of the planks. This isn’t just for a natural look; it provides the structural integrity needed to keep the floor stable. They also leave small gaps around the perimeter of the walls, which might look like a mistake at first but are essential “expansion gaps” that allow the wood to breathe and move with the seasons.
Engineered Hardwood Flooring Installations


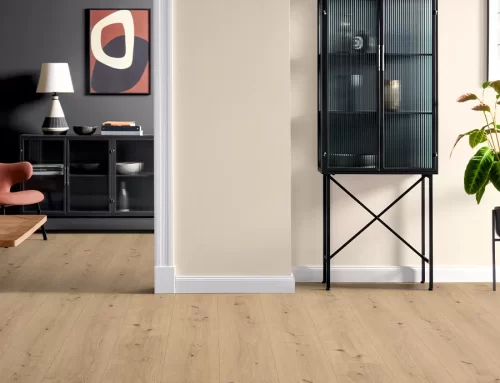
The final stage is where the room truly transforms. As the last row is fitted, the expansion gaps are hidden beneath baseboards and shoe moldings, creating a seamless transition from the floor to the walls. Threshold strips are installed in doorways to bridge the gap between different rooms. Even after the tools are packed away, the process isn’t quite over; the floor needs a quiet period of 24 to 48 hours for adhesives to cure or for the structure to settle before you move heavy furniture back in. The result is a solid, elegant surface that feels like a permanent part of your home’s character.
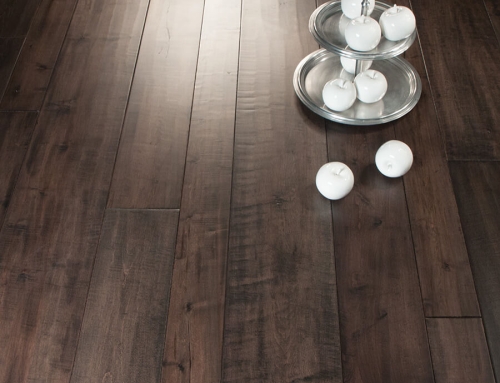
Some Completed Projects: Engineered Hardwood Installations


The Engineered Hardwood Installation Process
“Day-by-Day Timeline” for a Typical 1,000-Square-Foot Installation
For a typical 1,000-square-foot home project using engineered hardwood, the entire process—from the moment the wood enters your door to the moment you slide your sofa back—usually spans about 10 to 14 days.
Here is what that looks like day-by-day:
Phase 1: The Waiting Game (Days 1–7)
The first week is surprisingly quiet but essential. Once your flooring is delivered, it must sit in the rooms where it will be installed for a full acclimation period. Because engineered wood still contains real timber, it needs this time to reach a “moisture equilibrium” with your home’s unique environment. During this week, you should keep your thermostat at a normal, lived-in temperature (typically 60°F to 80°F).
Phase 2: Site Preparation (Days 8–9)
Work begins in earnest as the crew clears the space. They will spend these two days ripping out your old carpet, tile, or laminate and hauling it away. Once the subfloor is exposed, they perform “surgery” on the foundation—sanding down high spots or pouring self-leveling compound into low dips. This ensures the 1,000 square feet of wood sits perfectly flat, preventing future “hollow” sounds or bouncy spots.
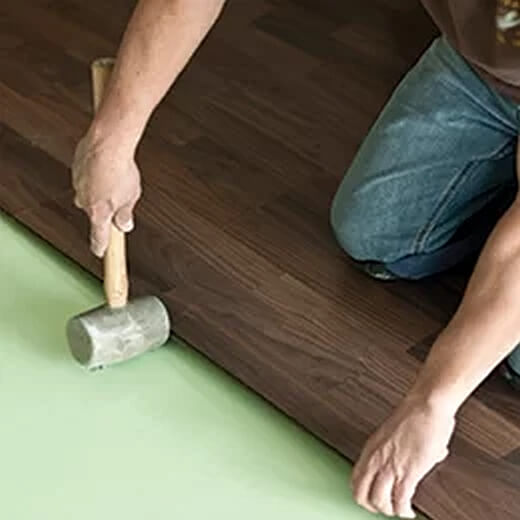
Phase 3: The Big Build (Days 10–11)
With the prep work finished, the transformation happens quickly. A professional two-person crew can typically install 500 to 750 square feet per day.
-
Day 10: They will lay the first 600–700 square feet, usually starting in the longest, most visible part of the house to set a straight line.
-
Day 11: They finish the remaining square footage and tackle the time-consuming “detail work”—notching wood around door frames, cutting around kitchen islands, and fitting planks into closets.
Phase 4: Finishing Touches (Day 12)
The last day of active labor is dedicated to the edges. The crew installs transition strips in doorways and attaches baseboards or shoe moldings. This is also when they perform a final “punch list” walkthrough, cleaning up adhesive smudges and ensuring every plank is securely seated.
Phase 5: The Cure (Days 13–14)
Even though the floor looks finished, it isn’t ready for full use. You should wait at least 24 hours before walking on the floors in socks and 48 hours before moving heavy furniture back. This is especially critical if the floor was glued down, as the adhesive needs time to chemically bond. By Day 14, your home is fully back in your hands.
Contractor Interview Checklist
To help you find the right crew for this timeline
When hiring a contractor for a significant home upgrade like engineered hardwood, you aren’t just paying for the labor; you’re paying for the technical precision of the subfloor prep and the layout.
Here is a checklist of questions to ask to ensure you’re hiring a professional who will protect your investment:
EXPERIENCE & PROCESS
-
“How do you handle subfloor moisture testing?”
-
What to look for: They should mention using a moisture meter. If they don’t test the subfloor before laying the wood, you risk warping and mold later on.
-
-
“Do you provide a formal ‘leveling’ assessment?”
-
What to look for: A pro will check for dips and peaks with a long straightedge. Ask if “minor leveling” is included in their quote or if that will be an additional line item.
-
-
“How many days do you recommend for wood acclimation?”
-
What to look for: If they say they can “install it the same day it’s delivered,” keep looking. They should insist on the 3–7 day period we discussed earlier.
-
LOGISTICS & PROTECTION
-
“Will you pull the baseboards or use shoe molding (quarter-round)?”
-
What to look for: Removing and reinstalling baseboards is more labor-intensive but looks cleaner. Adding shoe molding is easier but changes the look of your trim. Ensure you both agree on the aesthetic.
-
-
“How do you manage dust during the demolition and installation?”
-
What to look for: They should mention using plastic sheeting to seal off other rooms and vacuum-attached saws to minimize fine wood dust in your home.
-
-
“Who is responsible for moving heavy appliances and furniture?”
-
What to look for: Clarify this upfront. Some crews won’t touch gas stoves or refrigerators with water lines due to liability.
-
BUSINESS & WARRANTY
-
“Are you licensed and insured for this specific type of work?”
-
What to look for: Ask for a certificate of insurance. This protects you if a worker is injured on your property or if they accidentally nick a pipe.
-
-
“Do you offer a labor warranty separate from the manufacturer’s warranty?”
-
What to look for: The manufacturer only covers defects in the wood. A good contractor should offer at least a 1-year warranty on the installation (gaps, buckling, or loose planks).
-
Project Scope: Engineered Hardwood Installation
To get accurate, “apples-to-apples” quotes from different contractors, it is best to provide them with a written scope of work. This prevents “hidden fees” later on and ensures every bidder is quoting for the same level of quality.
Project Overview Installation of approximately 1,000 square feet of engineered hardwood flooring in the following areas: [e.g., Living Room, Hallway, Master Bedroom].
1. Materials & Acclimation
-
Flooring Type: [Insert Brand/Product Name, e.g., 7.5″ European Oak Engineered Hardwood].
-
Installation Method: [Insert Preference: Glue-down, Floating, or Staple-down].
-
Acclimation: Materials will be delivered to the site at least [5] days prior to installation. Contractor to verify moisture content of both subfloor and flooring material before starting.
2. Demolition & Prep
-
Removal: Contractor to remove and dispose of existing [carpet/tile/laminate] and underlayment.
-
Subfloor: Contractor to inspect subfloor for levelness. Quote should include basic prep (scraping, sweeping). Please provide a separate per-bag/per-hour rate for significant self-leveling or grinding if required.
-
Underlayment: [If floating] Install moisture barrier and sound-dampening underlayment as per manufacturer specifications.
3. Installation Details
-
Layout: Planks to be installed [longitudinal/parallel to the longest wall] with staggered joints (minimum 6″–8″ apart).
-
Vents/Obstacles: Undercut door jambs and casings for a professional fit.
-
Expansion: Maintain 1/2″ expansion gaps around all perimeters.
4. Trim & Transitions
-
Baseboards: [Option A: Carefully remove and reinstall existing baseboards] OR [Option B: Install new primed MDF/Wood baseboards provided by homeowner].
-
Transitions: Supply and install matching T-moldings or reducers at the following locations: [e.g., Bathroom tile transitions, Kitchen thresholds].
5. Clean-up & Protection
-
Dust Control: Use HEPA-filtered vacuum saws and plastic sheeting to protect non-work areas.
-
Waste: Contractor is responsible for daily debris removal and final haul-away of all scrap material.
-
Protection: Once installed, high-traffic areas should be protected with Ram Board or similar breathable protection if other trades are still working.