Prefinished Hardwood Floors: Best Choice for Homeowners
For Faster, Mess-Free Upgrade
Since you’re looking at this from an ordinary homeowner’s perspective, it’s helpful to bridge the gap between technical specs and everyday life. Here is an introductory paragraph to set the stage, followed by a balanced summary of the trade-offs you’ll face during the buying process.
The Introduction
Deciding to upgrade your flooring is one of the most significant investments you can make in your home, but the prospect of a weeks-long renovation often feels like a deterrent.
Traditional hardwood installation is notorious for its intrusive layers of fine dust and the chemical odors that linger long after the finish is applied. However, prefinished hardwood flooring offers a modern alternative that respects both your timeline and your living space.
By moving the heavy sanding and curing process out of your home and into a controlled factory setting, you can achieve the timeless beauty of real wood without the typical upheaval of a construction zone.
The Homeowner’s Summary: Pros and Cons
While the speed and cleanliness of prefinished wood make it a clear favorite for many, there are a few nuances to consider before placing an order.
The Advantages The primary benefit is immediate gratification; because the finish is cured under high-intensity UV lights at the factory, the planks are significantly harder and more scratch-resistant than site-applied polyurethane.
This is a massive win for households with pets or heavy foot traffic. Additionally, you know exactly what the color and grain will look like before a single nail is driven, eliminating the “stain surprise” that sometimes happens with raw wood.
From a budget perspective, while the material costs more upfront, you save significantly on labor because the installer doesn’t have to return for multiple days of sanding and coating.
The Trade-offs On the flip side, prefinished planks almost always feature a slight “micro-bevel” or a small notched edge. This is necessary to hide minor height differences between subfloor sections, but it does mean the floor won’t be perfectly flat like a basketball court; you will feel those tiny grooves under your feet.
It is also worth noting that if you ever decide to sand and refinish these floors ten years down the line, the factory coating is so tough that it requires much more effort (and sandpaper) to remove than a standard finish. Finally, if your subfloor is slightly uneven, prefinished wood is less forgiving than unfinished wood, which can be sanded level after it is installed.
COST ESTIMATES FOR A HOME FLOORING UPGRADE
PREFINISHED HARDWOOD INSTALLATION
When upgrading to prefinished hardwood floors in 2026, the total “all-in” price typically ranges from $6 to $25 per square foot, with most homeowners landing in the $12 to $18 range for a quality professional installation.
Because you’re purchasing a product that is already sanded and sealed, you pay more for the material upfront but save significantly on the labor and time required for on-site finishing.
Cost Breakdown per Square Foot
To build an accurate budget, you can categorize your expenses into three main buckets:
| Category | Estimated Cost per Sq Ft | What’s Included |
|---|---|---|
| Materials | $4 – $12+ | The wood planks (Oak/Maple are lower; Walnut/Exotic are higher). |
| Labor | $3 – $8 | Professional installation (nail-down or glue-down). |
| Prep & Extras | $2 – $5 | Old floor removal, underlayment, and new baseboards/trim. |
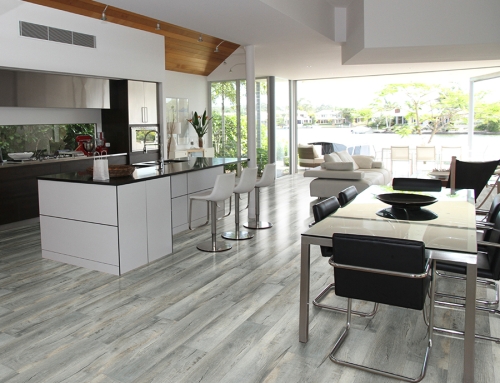
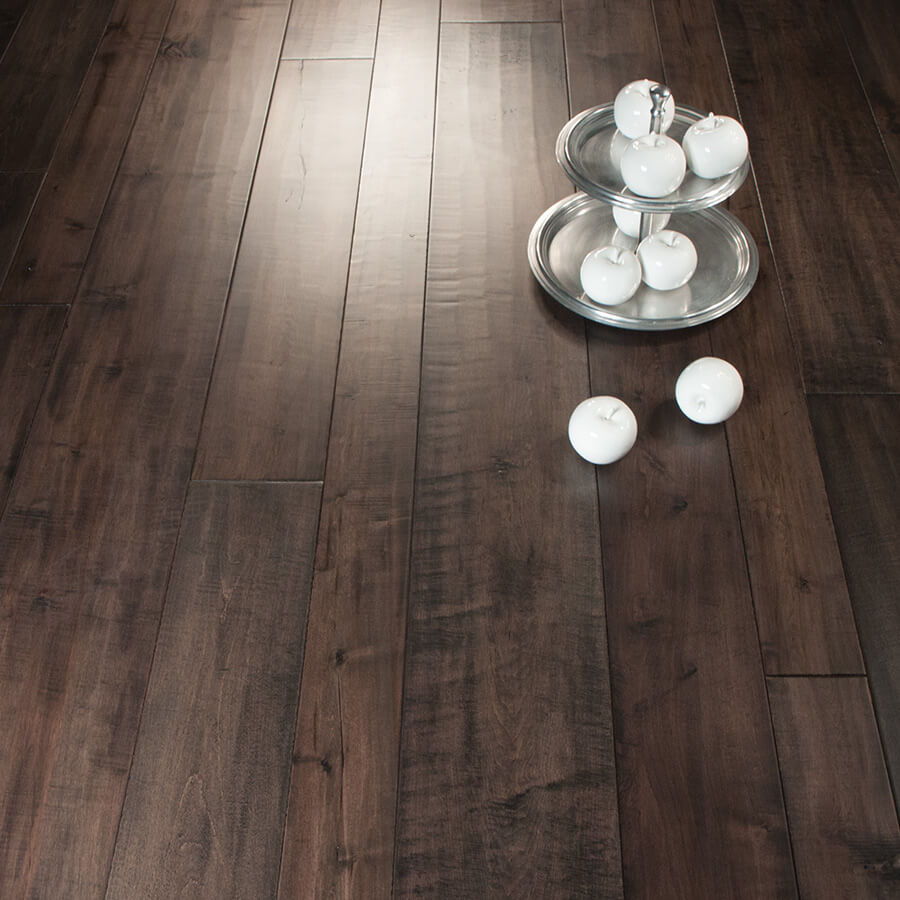
Upgrade to Prefinished Hardwood Floors
Total Project Scenarios (1,000 Sq. Ft.)
For a standard 1,000-square-foot project (roughly a large open-concept living area and two bedrooms), here is what you can expect to spend at different quality tiers:
-
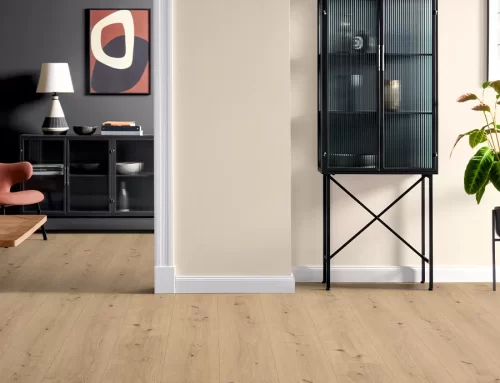
The Budget-Conscious Upgrade ($7,500 – $10,000): Uses common domestic wood (like Red Oak or Hickory) in a “character grade” (more knots and color variation). Includes DIY removal of old carpet and basic foam underlayment.
-
The Standard Homeowner Choice ($12,000 – $16,000): The most common scenario. Uses high-quality White Oak or Maple planks. Includes professional removal of old flooring, minor subfloor leveling, and new matching trim/moldings.
-
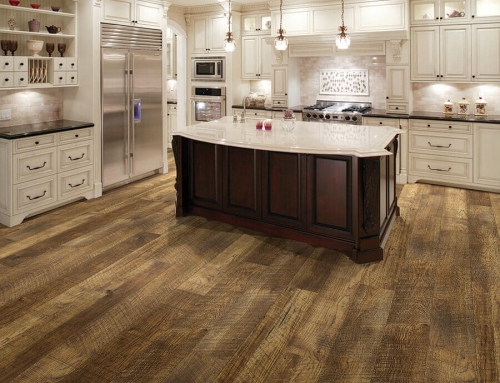
The Premium Upgrade ($20,000 – $25,000+): Features wide-plank boards, exotic species (like Brazilian Cherry), or intricate patterns like herringbone. Often includes significant subfloor repair or high-end acoustic underlayment for soundproofing.
The “Hidden” Costs to Watch For
When looking at quotes, verify if these “extra” line items are included, as they can quickly add $1,000 to $3,000 to a whole-home project:
-
Floor Removal: Removing old carpet is cheap (~$1/sq. ft.), but removing glued-down tile or old wood can cost up to $4/sq. ft.
-
The 10% Overage: You must order about 10% more material than your actual square footage to account for cuts, waste, and “sorting” out boards you don’t like.
-
Subfloor Prep: If your subfloor is unlevel or damaged, contractors may charge $1–$3 per square foot to sand down high spots or fill low spots.
-
Stairs: These are rarely charged by the square foot; expect to pay $150 – $300 per step for labor and materials.

HOW TO FIND THE RIGHT CONTRACTOR
A Checklist of several questions is provided to each potential contractor. The answers, company profile and qoute must be submitted back to you. These will help you determine and choose the right contractor for the job.
As an ordinary homeowner, you want to make sure you aren’t just paying for the materials, but for a professional result that lasts. Since prefinished wood is essentially a “finished flooring product” the moment it comes out of the box, the stakes for a clean installation are actually higher—there’s no sanding later to fix a mistake.
Here is a checklist of targeted questions to ensure your contractor is prepared for a high-quality, prefinished install:
1. Moisture and Acclimation
-
“How long do you recommend the wood acclimate in my home before installation?”
-
Why it matters: Wood expands and contracts. Prefinished planks usually need 3 to 7 days inside your living space (not the garage!) to adjust to your home’s humidity.
-
-
“Will you be performing moisture tests on both the new flooring and my subfloor?”
-
Why it matters: If the subfloor is too damp, your beautiful new wood will warp or “cup” within months.
-
2. Subfloor Preparation
-
“What is your plan if the subfloor isn’t perfectly level?”
-
Why it matters: Unlike unfinished wood, you can’t sand down high spots once prefinished planks are in. They may need to use a self-leveling compound or shim the joists.
-
-
“What type of underlayment or vapor barrier are you using?”
-
Why it matters: This protects your investment from moisture rising from below and can help with sound dampening.
-
3. The Installation Process of Prefinished Hardwood Floors
-
“How do you handle ‘racking’ the floor and blending boards from different boxes?”
-
Why it matters: Wood is a natural product with color variations. A good installer will open several boxes at once to mix the shades, preventing “dark patches” or “light patches” in the middle of your room.
-
-
“What tools will you use to ensure the factory finish isn’t scratched during the install?”
-
Why it matters: They should be using flooring nailers with protective “foot” plates and ensuring their saws have sharp, clean blades to prevent chipping the brittle factory topcoat.
-
4. Finishing Touches and Cleanup
-
“Are transitions, baseboards, and shoe moldings included in your quote?”
-
Why it matters: You don’t want to find out on the last day that the gaps against the wall aren’t covered or that the “t-molding” between the wood and your kitchen tile isn’t included.
-
-
“How do you plan to handle the expansion gaps around the perimeter?”
-
Why it matters: Wood needs room to breathe. If they butt the wood tight against the wall, the floor will eventually buckle.
-
Pro-Tip for Homeowners:
Always ask for a “waste factor” estimate. Usually, you should order 10% more than your actual square footage to account for cuts and the occasional board with a natural defect.
TO RECAP
For any homeowner who has ever endured the grueling process of sanding and finishing floors on-site, the appeal of prefinished hardwood floors is immediately apparent.
Choosing a traditional unfinished floor often means turning your home into a construction zone for a week or more, complete with fine layers of dust that migrate into every cabinet and the lingering, chemical scent of polyurethane.
It is a slow, methodical test of patience that leaves you waiting days for coats to dry before you can even think about moving your furniture back into place.


Prefinished hardwood flooring completely changes that narrative by shifting the most intensive labor from your living room to a controlled factory environment. Because the wood arrives already sanded, stained, and sealed with high-performance topcoats, the installation process becomes a streamlined transformation.
There is no guesswork regarding the final color, and more importantly, there is no mess. The moment the last plank is nailed or clicked into position, the project is finished. You can walk on your new floors in your socks, slide your sofa into its new home, and host a dinner party the very same evening.
Beyond the sheer speed of the upgrade, there is a technical superiority to the factory finish that is hard to replicate in a residential setting. These planks are often treated with multiple layers of aluminum oxide-infused finishes and cured under powerful UV lights, creating a surface that is significantly tougher and more scratch-resistant than anything applied by hand.
For a busy household with pets, kids, or high foot traffic, this means the floor doesn’t just look better on day one; it stays looking that way for years to come. By choosing the prefinished route, you aren’t just saving yourself from the headache of a dusty renovation; you are investing in a durable, professional-grade surface that respects both your time and your home’s air quality.