LVP Flooring: Astonishing Designs
—by Hallmark Floors
LVP Flooring Designs looks impressive. Utilizing selections from the Voyager PVC-Free Resilient LVP collection from Hallmark Floors is a pioneering option in the healthcare industry, devoid of polyvinyl chloride and synthetic solvents.
Made from polypropylene, these floors offer high wear and heat resistance, making them ideal for demanding healthcare environments.
Voyager’s variety of colors and naturally beautiful wood patterns are thermally sealed with protective finishes and FloorScore® Certified, ensuring minimal environmental impact and top-tier performance.
The Advantages you get with LVP Flooring

PERFORMANCE
✓ Premium Waterproof
✓ Non-Vinyl Polymeric Composite
✓ Promotes Balance
✓ Ultra High Wear – Performs under extreme temperatures
✓ High abrasion resistance – withstands 30,000+ revolutions

HEALTHY & CERTIFIED
✓ Certified Member Health Product Declaration
✓ Free of Halogens, Plasticizers, Chlorine & Phthalates
✓ 100% FloorScore® Certified
✓ GreenHealth Approved™
✓ Formaldehyde Free – Low VOCs

FASHION
✓ Realistic Plank Width
✓ High Definition Printing
✓ Authentic Wood Visuals
✓ Square Edge
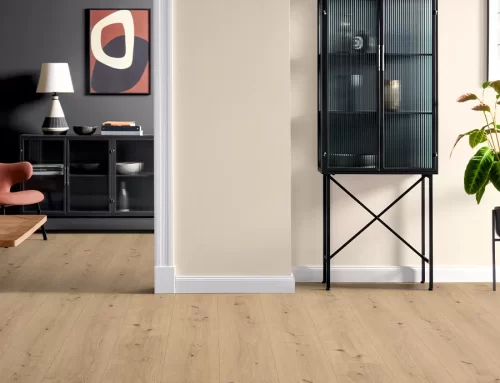
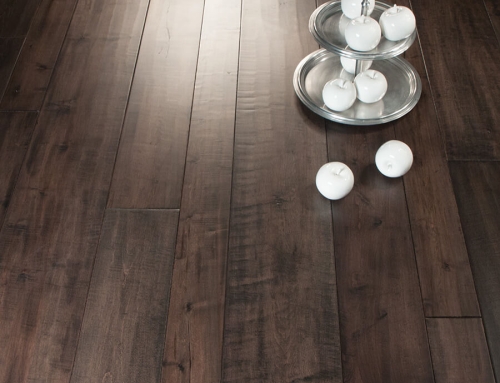
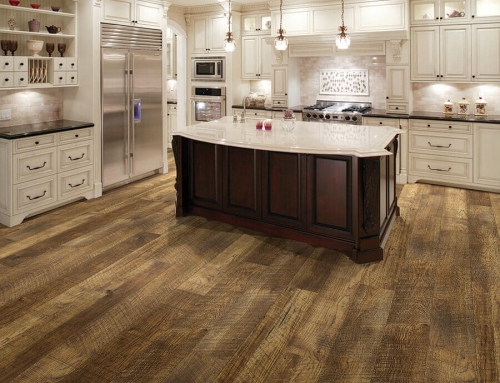
Some LVP Flooring Designs


How to Install LVP Flooring
Step-by-Step LVP Installation
Preparation
✴ Gather Materials: You’ll need LVP planks, a tape measure, a utility knife, spacers, a rubber mallet, underlayment (if required), and a straight edge.
✴ Acclimate Flooring: Leave the LVP planks in the room for at least 48 hours before installation to acclimate to the room temperature and humidity.
✴ Prepare the Subfloor: Make sure the subfloor is clean, dry, and level. Remove any old flooring, and fix any cracks or uneven areas.
Planning
✴ Measure the Room: Measure the length and width of the room to determine the number of planks you’ll need. Plan your layout to minimize the number of cuts and waste.
✴ Layout: Dry-lay a few rows of planks to visualize your layout and make any necessary adjustments. Ensure you stagger the seams for a more natural look.
Installation
✴ Start Laying Planks: Begin in one corner of the room, placing spacers between the wall and the planks to maintain an expansion gap. Lay the first row of planks with the tongue side facing the wall.
✴ Click and Lock: Insert the next plank into the end of the first plank at an angle and press down to click and lock them together. Continue this process for the entire row.
✴ Stagger the Joints: Start the next row with a plank cut to a different length to stagger the joints. This helps to create a more stable and aesthetically pleasing floor.
✴ Cutting Planks: Use a utility knife and a straight edge to score and snap the planks to fit around corners and edges. For tricky cuts, a jigsaw or a miter saw might be helpful.
Finishing
✴ Remove Spacers: Once all planks are laid, remove the spacers from around the room.
✴ Install Trim: Install baseboards or quarter-round trim to cover the expansion gap between the flooring and the walls.
✴ Cleaning: Clean the newly installed floor with a damp mop to remove any dust and debris.
✴ Remember, patience is key, and double-checking your measurements and cuts will save you time and headaches down the line.
“Hallmark Floors Inc. is dedicated to creating stunning, top-quality flooring options like the LVP Flooring, while providing exceptional customer service. Our goal is to transform each customer’s space with our carefully crafted floors, one project at a time. With a commitment to excellence and innovation, we strive to offer a diverse range of flooring solutions that cater to every style and preference. At Hallmark Floors, we believe that every floor tells a story, and we are here to help you create a space that reflects your unique identity and vision. Experience the difference with Hallmark Floors – where quality meets beauty.”