How to Refinish Engineered Hardwood Floors
The Right Way
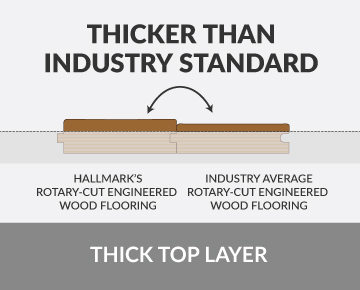
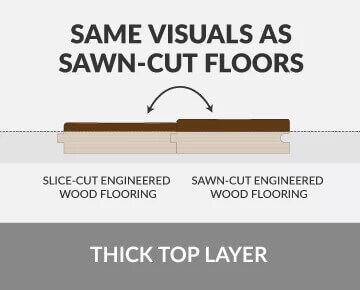
Refinishing engineered hardwood floors requires a delicate approach compared to solid hardwood because of the veneer (wear layer) thickness, which is the thin layer of real hardwood on the surface.
Here are Flve Steps in refinishing your engineered hardwood floors, starting with the most critical step: Assessment.
Step 1: Assess Your Floor’s Veneer (Wear Layer)
Before you begin, you must determine if your floor can be sanded.
☑ Check Thickness: If you have documentation from the manufacturer, check the thickness of the veneer layer.
☑ 1mm or less: Do not sand. You will likely sand right through to the core. A screen and recoat is your only safe option.
☑ 2mm or more: May allow for one or two light sandings. Proceed with extreme caution.
☑ 4mm or more: Ideal for refinishing and can typically withstand multiple sandings.
☑ Check Damage: Look for deep gouges, water damage, or areas where the veneer has separated from the core (delamination). If the damage is significant or deep, sanding may not be possible, and board replacement might be necessary.
☑ Alternative: If your floor only has minor surface scratches and a dull finish, the safest and most common method is a Screen and Recoat (also called buffing and recoating), which removes the finish without touching the wood.
Step 2: Prepare the Area
A meticulous setup is key to a smooth and clean finish.
☑ Clear the Room: Remove all furniture, rugs, and decorative items.
☑ Inspect and Secure: Check for any protruding nails or staples and countersink them. Fill small holes or gaps with a wood filler that matches your wood color. Allow it to dry and lightly sand smooth.
☑ Clean Thoroughly: Sweep, vacuum, and then use a slightly damp mop with a pH-neutral wood floor cleaner. The floor must be impeccably clean and completely dry before sanding or applying any finish.
☑ Seal and Protect: Cover doorways, vents, and any built-ins with plastic sheeting to contain dust. Wear a dust mask and eye protection.
Step 3: Sand or Screen (Choose Wisely)
This is the most critical part of the process.
OPTION A: SCREEN AND RECOAT (For Light Wear)
☑ Goal: To roughen and remove the old finish so a new finish can adhere, without sanding into the wood veneer.
☑ Equipment: Use a floor buffer with a fine-grit screening pad (or buffing screen).
☑ Process: Buff the entire floor, following the grain, to scuff the old finish. The goal is a dull, uniform surface, not bare wood. This is less abrasive than sanding.
OPTION B: GENTLE SANDING (For Deeper Scratches – 2mm+ Veneer ONLY)
☑ Equipment: Do not use a heavy drum sander. A lightweight orbital sander or random orbital sander is generally recommended. Use a handheld orbital or edge sander for edges and corners.
☑ Start with Fine Grit: Begin with a fine-grit sandpaper (100-120 grit). The goal is to remove the old finish and minor imperfections, not a significant amount of the wood.
☑ Sanding Technique: Always sand with the grain of the wood. Work in consistent, overlapping passes. Keep the sander moving to avoid gouging the thin veneer.
☑ Progress (If Necessary): If imperfections remain, you can carefully move to a slightly finer grit (e.g., 150-180), but be extremely cautious not to over-sand.

Step 4: Clean and Apply Finish
After sanding or screening, a flawless clean is essential for a beautiful finish.
☑ Vacuum Meticulously: Thoroughly vacuum the floor to remove all sanding dust, especially in corners and edges.
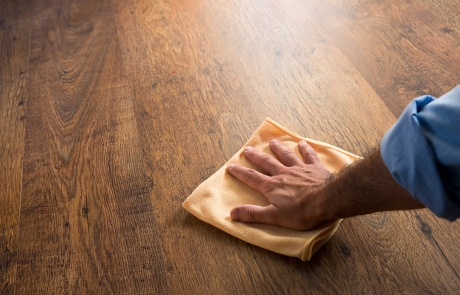
☑ Tack Cloth/Damp Wipe: Wipe the floor with a tack cloth or a slightly damp cloth (ensure it’s not too wet) to pick up any remaining fine dust particles. Let the floor dry completely.
☑ Apply Stain (Optional): If you are changing the color, apply a wood stain according to the manufacturer’s directions, wiping away excess. Ensure the stain is completely dry.
☑ Apply Finish: Choose a high-quality wood floor finish, such as polyurethane (water-based or oil-based).
Apply thin, even coats with a quality applicator (brush or roller), following the wood grain.
Allow each coat to dry completely per the manufacturer’s instructions.
Lightly buff or screen (with a very fine grit, e.g., 220+) the floor between coats to ensure good adhesion and a smooth surface.
Apply two to three coats for good protection and durability.
Step 5: Cure and Maintain
Patience at this stage is crucial for a durable finish.
☑ Drying vs. Curing: The finish may be “dry to the touch” in hours, but it needs time to cure (harden fully).
☑ Foot Traffic: Avoid walking on the floor for 24 to 72 hours (check product label).
☑ Furniture/Rugs: Wait for the finish to fully cure—often 7 days or more—before replacing heavy furniture or putting down rugs. Place felt pads under all furniture legs.
☑ Cleaning: For the first few weeks, only use a soft broom or dry mop. Avoid using water or harsh chemicals until the finish has completely cured.
Because the margin for error is small with engineered hardwood, if you are unsure about your floor’s veneer thickness or your ability to sand gently and evenly, hiring a professional is highly recommended.
THE COST to REFINISH WOOD FLOORS
The cost to refinish engineered wood floors can vary quite a bit based on a few key factors.
For professional refinishing, the general price range is typically $3 to $8 per square foot, which usually includes both labor and materials.
Here is a breakdown of what influences the final cost:
| Factor | Cost Impact | Details |
|---|---|---|
| Type of Wood Veener | $3 – $6 per sq. ft. | Engineered wood generally falls in this range. The cost depends on the wood species. (e.g., maple or exotic woods might be slightly higher). |
| Sanding Required | Crucial for Engineered | The thickness of the top veneer layer dictates if it can even be sanded. Thicker veneers can handle full sanding, which is more costly than just a light screening/recoating. |
| Condition of the Floor | Higher Cost for Damage | Deep scratches, gouges, or water damage may require board replacement or more intensive sanding, increasing the labor and Total cost. |
| Type of Finish/Stain | Adds to Material Cost | Staining the wood to change its color (vs. just a clear coat) or choosing a high-quality water-based or oil-modified polyurethane will add to the materials expense. |
| Total Square Footage | Economies of Scale | Smaller projects often have a higher cost per square foot, as contractors usually have a minimum charge. Larger areas can sometimes bring the per-square-foot cost down. |
| Additional Services | Adds to Total | Moving furniture, dustless sanding (which is an upgrade), or repairing subflooring will add extra charges. |
Example Project Costs
For a typical area:
| Area Size | Estimated Professional Cost Range |
| 100 sq. ft. (Small Room) | $300 – $800 |
| 400 sq. ft. (Living Room) | $1,200 – $3,200 |
| 1,000 sq. ft. (Main Floor) | $3,000 – $8,000 |
DIY vs. Professional Refinishing
| Option | Estimated Cost for an Average Project | Key Consideration |
|---|---|---|
| Professional | $3 – $8 per sq. ft. | Guaranteed quality, experience with engineered wood’s veneer thickness, less stress, faste completion. |
| DIY | $1 – $2 per sq. ft. in materials/rentals (excluding your labor) | Significant risk of sanding through the thin veneer, which would lead to the need for a full replacement. |
Important Note on Engineered Wood: Before hiring a professional or attempting DIY, it’s vital to determine the thickness of your floor’s veneer (the top layer of real wood). If it’s too thin, sanding it will ruin the floor, making a full replacement the only option. A professional can typically assess this for you.
HOW MANY TIMES TO REFINISH ENGINEERED WOOD FOR 20 YEARS?
The number of times you can refinish your engineered hardwood floors in 20 years depends almost entirely on the thickness of its top layer, called the wear layer.
Engineered hardwood floors are not all created equal, so there isn’t one single answer. However, here is a general breakdown based on wear layer thickness, which determines the maximum number of times you can sand it down:
Estimated Wear Layer Thickness in 20 Years (Residential Use)
1mm or Less 0 (Cannot be sanded; only recoated) 0 (Only recoat the finish)
2mm 1 light sanding/refinishing 0 to 1
3mm 1 to 2 sandings/refinishings 1 to 2
4mm – 6mm 2 to 5 sandings/refinishings 1 to 3
Key Takeaways for Homeowners
Always check your wear layer so you need to know the thickness (in millimeters or mm) of the real wood veneer (wear layer) on your floor. If you have the original product information, check the specifications. This is the most critical factor.
Refinishing is not always necessary A full, deep refinishing (sanding down to bare wood) is usually only needed every 15 to 20 years in a typical residential setting with moderate traffic.
Estimating on the screening/recoating work, more often, you may only need a light surface renewal called “screening” or “recoating,” which is less invasive and just replaces the top protective finish. This can usually be done a few times before a full sanding is needed and doesn’t remove much of the wood.
For your 20-year window, you would likely only need a full refinish once, or possibly twice, depending on your floor’s wear layer thickness and how much foot traffic your home sees.

